Blockchain data for EVM and Solana: balances, tokens, prices, DeFi and RPC via free-tier vendors
Quick Install
Automated & IDE SetupCopy the AI prompt to install this server into Claude Code, Cursor, or another agent — or use 1-click editor setup below.
One-click editor setup isn’t available for this listing yet — we don’t have a confirmed install command, and we’d rather show nothing than point your editor at the wrong package or host. Follow the project’s own setup instructions, linked above.
Manual Client & Custom JSON ConfigExpand JSON ▾
No confirmed setup config for this listing yet. We only publish a config block when the install details come from the project itself — its README, its docs, or a verified owner. We haven’t found those for Onchain Data MCP, and we’d rather show nothing than a guess you’d paste into your client. Follow the project’s own setup instructions for the current steps.
Documentation Overview
onchain-data-mcp
Give your AI assistant live blockchain data: wallet balances, payments, prices, scam checks and more. Free to start, no sign-ups needed.





The Claude Desktop button downloads a file you double-click; it has everything inside. The Cursor and VS Code buttons only add the settings, so install the program first.
onchain-data-mcp is one small program that lets AI apps like Claude, Cursor and VS Code read the blockchain. It works with Ethereum, Base, Arbitrum, Optimism, Polygon, Avalanche, BNB Chain, Robinhood Chain and Solana.
Behind the scenes it asks about 30 data services ("providers") for you. If one is slow, busy or down, it quietly asks the next one. Free services come first, so you can start without paying anything and without any sign-ups.
A few words you will see here:
- MCP is a standard way for AI apps like Claude to use outside tools. This program is an "MCP server": a tool your AI app can use.
- API key is a free password a data provider gives you when you sign up. You don't need any to start. Adding a couple makes answers faster and more complete.
- Wallet address is the public "account number" of a crypto wallet, like
0xd8dA…6045or7xKX…9sHc.
Contents
- What you can do
- Quick start
- Connect to AI apps
- The dashboard
- Password and keys
- Data providers
- Available tools
- Real-world examples
- Running it for others
- Troubleshooting
- FAQ
- For developers · Security · License
What you can do
Ask your AI assistant questions in plain words. It picks the right tool and gets the answer.
- Check wallets. See what coins and tokens a wallet holds, on every chain at once. "What does wallet 0xd8dA6BF26964aF9D7eEd9e03E53415D37aA96045 hold?"
- Confirm payments. Check that a customer really paid the right amount of USDC to the right address. "Did transaction 0xabc… on Base pay 25 USDC to my shop address?"
- Stay safe. Check if a token is a scam, if an address is on a sanctions list, or if a stablecoin is losing its value. "Is this token on Solana a honeypot?" · "Is USDT still worth one dollar?"
- Follow the money. Get transaction details, fees, and a bank-style statement for a wallet. "Show me last week's incoming payments to my wallet, with their dollar value."
- Prices and swaps. Get token prices from several sources, past prices, and swap quotes. "What's the best price to swap 1 ETH to USDC on Arbitrum right now?"
- Tokenized stocks. Look up stock tokens on Robinhood Chain and their prices. "What is the price of the Tesla stock token on Robinhood Chain?"
It only reads data, with one exception: it can send a transaction that you already signed yourself in your own wallet. It never holds your keys and can never move your money on its own.
Quick start
Three steps, about five minutes.
1. Install the program
Pick one. You only need to do this once.
Mac or Linux (open the Terminal app and paste):
Windows (open PowerShell and paste):
Homebrew (Mac or Linux):
Claude Desktop only, no Terminal needed (Mac and Windows): download onchain-data-mcp.mcpb and double-click it. Claude Desktop asks for an optional dashboard password and optional provider keys. You can leave them all empty. Then skip to step 3.
Other ways: Docker, or build it yourself
Docker, for AI apps (Docker is a tool that runs programs in a sealed box):
Docker, running in the background with the dashboard at http://127.0.0.1:8787/dashboard:
Build it yourself (needs Rust 1.90 or newer):
When it's done, open a new Terminal window and check it works:
The installers put the program in a folder called .cargo/bin inside your home folder
(for example /Users/you/.cargo/bin/onchain-data-mcp, or C:\Users\you\.cargo\bin\onchain-data-mcp.exe on Windows).
2. Connect your AI app
Follow the steps for your app in Connect to AI apps below. Then restart the app and ask it something, like "Which chains can you read?"
3. Open the dashboard
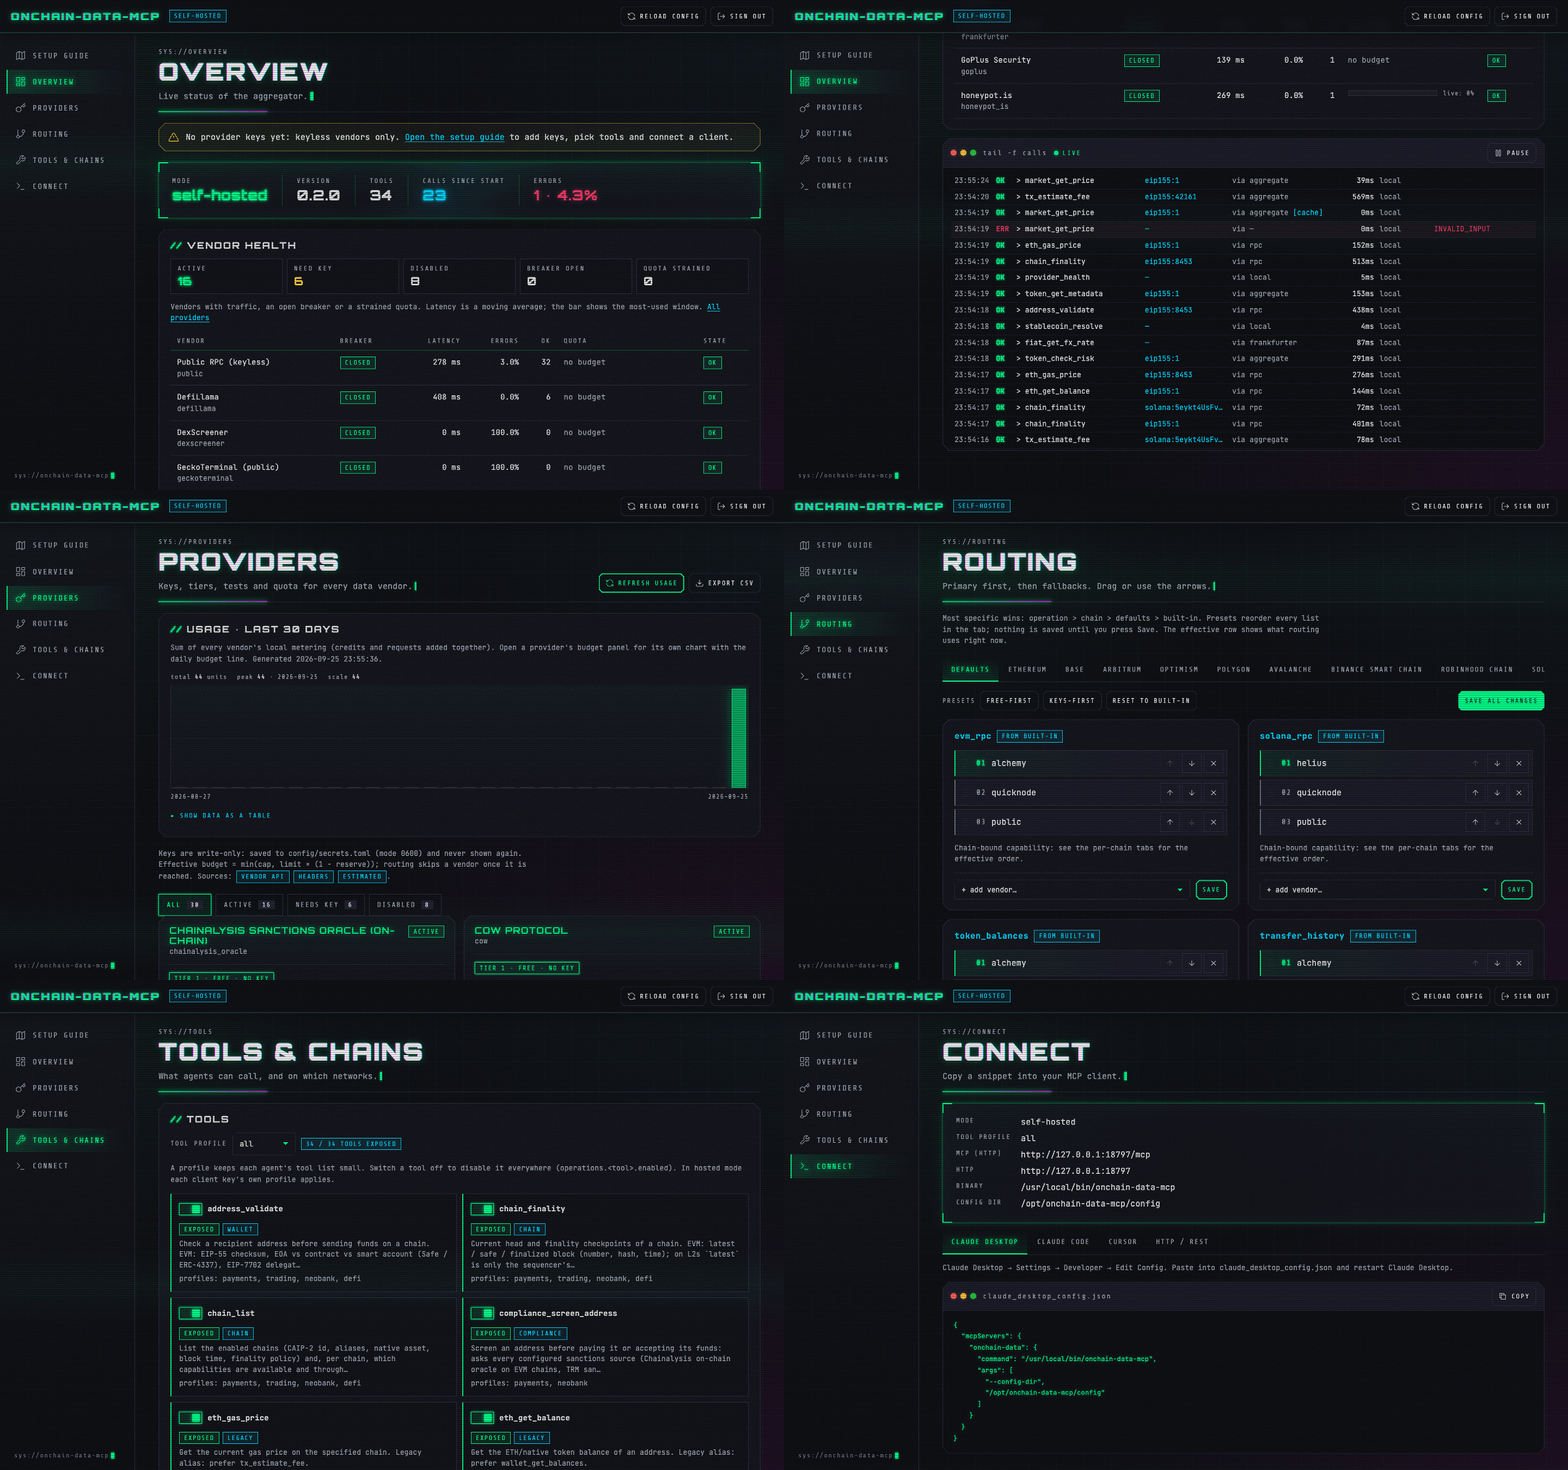
The dashboard is a control panel in your web browser. While your AI app is open, it runs at
http://127.0.0.1:8787/dashboard. It is protected by a password that was made for you.
To see it, run this in the Terminal (use the same folder you used in step 2):
You'll see something like:
Open the one-click login link and you're in. The Setup guide walks you through the rest: add keys, pick tools, connect.
If you used the Claude Desktop bundle, your folder is
~/.onchain-data-mcpunless you picked another one.
Connect to AI apps
Pick one folder for your settings and use it everywhere. We use ~/.onchain-data-mcp here
(a folder called .onchain-data-mcp in your home folder). Replace you with your user name.
Why the full path? Some apps start programs from a different place, so short paths like config
end up in the wrong folder. A full path always works.
Claude Desktop
-
Open Claude Desktop, go to Settings → Developer → Edit Config. This opens
claude_desktop_config.json:- Mac:
~/Library/Application Support/Claude/claude_desktop_config.json - Windows:
%APPDATA%\Claude\claude_desktop_config.json
- Mac:
-
Paste this in (keep any other servers you already have inside
"mcpServers"):commandis where the program is. Find yours withwhich onchain-data-mcp(Mac/Linux) orwhere onchain-data-mcp(Windows). Homebrew puts it in/opt/homebrew/bin/onchain-data-mcp.- On Windows, use paths like
"C:\\Users\\you\\.cargo\\bin\\onchain-data-mcp.exe"(double backslashes). - The keys are optional. Leave them empty, remove them, or add them later in the dashboard.
-
Quit Claude Desktop completely and open it again.
Claude Code
Cursor
Click the Install in Cursor button at the top, or paste this into ~/.cursor/mcp.json
(or .cursor/mcp.json inside one project), then turn it on in Cursor Settings → MCP:
VS Code
Click the Install in VS Code button at the top. To use your settings folder, open the MCP
settings in VS Code and add "args": ["--config-dir", "/Users/you/.onchain-data-mcp"].
Other apps (over the web address)
Related MCP Servers
Reviews
No reviews yet — be the first to share how this listing worked for you.
Frequently Asked Questions about Onchain Data MCP
AllMCPs Directory Badge
Showcase your server listing on GitHub or your project documentation. Embed this dynamic SVG badge to highlight official listing status and live engagement.
Badge Style:
Live Dynamic SVG Preview
Markdown (GitHub README)
[](https://allmcps.com/mcp/onchain-data-mcp)HTML Embed
<a href="https://allmcps.com/mcp/onchain-data-mcp"><img src="https://allmcps.com/api/badge/onchain-data-mcp?style=directory" alt="Onchain Data MCP on AllMCPs" /></a>